I’ve been teaching package design at Clemson University since 2007. Over the years, I’ve noticed a change in how students mentally approach the prototyping phase of the design process.
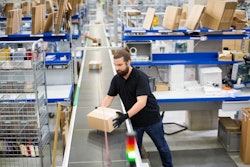
When I started my academic career, students were quick to grab paper, film, or board, pull out their rulers, then measure, cut, and prepare physical prototypes on the manual cutting and creasing tables. Through this process, students “worked” the substrate and were able to craft highly functional and custom structural designs without the need for software. The pain in this process, back then, was converting that physical design into a digital design.
Today, 14 years later, the pain has shifted. All students are introduced to the Adobe Creative Suite in their first year; in fact, most general education courses involve projects that develop graphic design skills. Nearly all packaging students are competent in 2D and 3D design by the time they arrive in my classroom. All have learned to quickly generate parametric standards with a few clicks. But when it comes to a custom structure, a lot of students struggle during the conceptual phases of the design process. Designing, for many, begins and ends on a screen; the default is no longer to work the substrate.
 | Watch this webinar on package design, 'Consumer-Centric Packaging Innovation.' |
I’ve noticed, as well, that designing on a screen can limit creativity. You can fold a sheet of paper in an instant, but redesigning and rendering a simple fold in software requires many more clicks. The screen encourages the development of inserts and dunnage that look great, but if crafted crudely by hand, would quickly show the designer how impractical that solution would be. That kind of interaction between substrate and product is an experience I have yet to see emulated well on a screen.
So, with changing times, I’ve had to redefine and reintroduce the “old-fashioned” ways and have developed a process that enables students to reap the benefits of both digital and physical worlds through a five-step process.
1. Inspiration, Market Research, and Brainstorming: While this article is not about conducting market research or generating 100 ideas, those are a big part of my class. Understanding the competitive landscape and inspiring package designs is essential to aligning work to a vision. Without an understanding of the current state, students struggle to justify their visions for the future state.
2. Sketching: Not everyone is competent in sketching out 3D designs. I’ve watched students overinvest in perfecting dimension in their sketches. I suggest thinking about panels. Sketch out rectangles that represent the panels of your package and stack them up. All you need is paper and pencil and a few ideas. I encourage students to go back to their market research and ensure that all required visual elements have a home on the initial sketches. Colored pencils go a long way as well, and make it a little more fun.
3. Hack Prototypes: This is one of my favorite stages. It’s also the one my students don’t understand at first. During this stage, you use the most basic of tools and supplies—a flat substrate (paper, film or sheets, or cardstock), scissors, and tape (lots of tape)—to create 3D rudimentary prototypes of the sketches created in the previous step. You will literally hack the pieces together. This should be a “fail fast” process: Don’t cut a dieline, instead cut all the individual pieces that make up the dieline. Need a cube? Cut six pieces of paper and tape them together. Now is not the time to worry about straight lines, dielines, production costs, or anything like that. You are simply taking the best of your sketches and bringing them to life. Creating this hack prototype allows you the chance to begin to see what will work and what won’t and what might work better if only this tweak were made. You begin to see how your prototype takes up space in three dimensions, and you become familiar with it in a way you won’t ever be able to if you go straight to the computer. I encourage students to create at least three different hack prototypes; they need to have those prototypes with them to be most effective in the next step.
 | Read Hurley column, 'Unseen is Unsold: The Influence of Product Visibility on Sales' |
4. Digital Prototype: With a hack prototype in hand, carefully cut it apart and lay it flat. You now have the template to translate the physical design into a digital one. At this point, it may be easier to generate a parametric standard and then modify it—a relatively simple task once the layflat hack prototype is measured, because you’ve already done the majority of the hard work in constructing it. By pulling the visuals collected in the market research and sketching phases, you already have an idea of how they should be placed on each panel without having to play and adjust them to get them facing the right direction on the completed rendering.
5. Continuous sampled iterations: At this point, most packaging folks will send files to be UV printed and sampled on a digital cutting table. There’s nothing wrong with that, but you can also simply print the dieline to scale on multiple sheets of printer paper and trace it onto the chosen substrate. I’ve seen a few savvy packaging sales professionals simply scale the design down for their home printer, print on cardstock, cut it out with scissors (or ruler and craft knife, if you want more precise cuts and creases), and use small bits of tape to hold it together. Regardless, the point here is to fine-tune the design, ideally at proper scale and on substrate. I encourage students to hold off on UV printing until they’ve worked out the kinks through unprinted blanks sampled on the digital cutting table. Once students hand me their first beautifully crafted and printed project, I hold it in my hands, extend my arms straight out, and drop it on the ground. There is no computer program (yet) that simulates this real life situation and the learning that comes from it.
Bottom line, the goal is to reintroduce the traditional idea and practice of “working the substrate” through a process that does not make students feel it is redundant with their digital design skills. I’d like to know your thoughts: What is your prototyping process? Are there other steps to consider? Please feel free to send me a note with your thoughts, comments, and constructive feedback.
Dr. R. Andrew Hurley is an Associate Professor at Clemson University. He can be reached at [email protected].